Use this guide to help you learn about the key features in your InspectorADE.com website account. The IA app is very similar. For a more detailed explanation of all the features of InspectorADE, go to the top menu while on the website and click on the Support tab.
There are a ton of videos on YouTube to show you different things about, and how to use InspectorADE.
Follow the numbers below the snapshots for an explanation of each section.
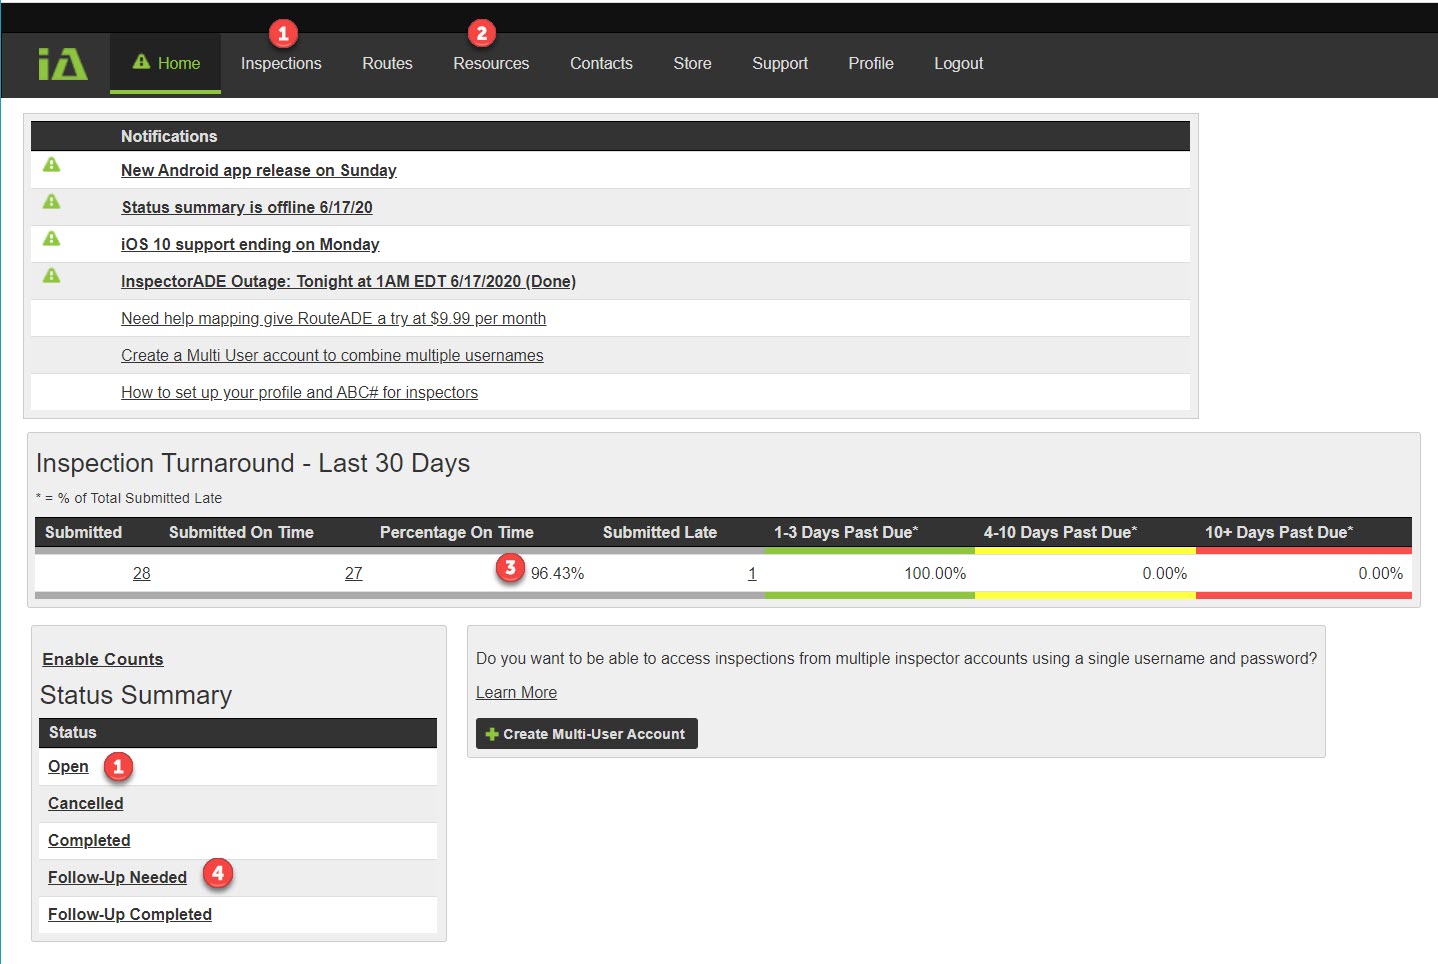
- After login, you will be taken to the Home screen where you can either click on Open in the Status Summary or the Inspections tab. If you click on the Inspections tab you will also have to select Open from the pull-down menu under Status.
- The Resources tab is where you will find FTV (First Time Vacancy) postings, letters to leave in an envelope at the door, vacancy certifications, and more.
- Your Turnaround time in the Percentage completed on time. You need a 95% to qualify for Net-30 deposits.
- The Follow-Up Needed link takes you to inspections that you need to resolve for specific issues you will see in the Comments section.
Inspections Page
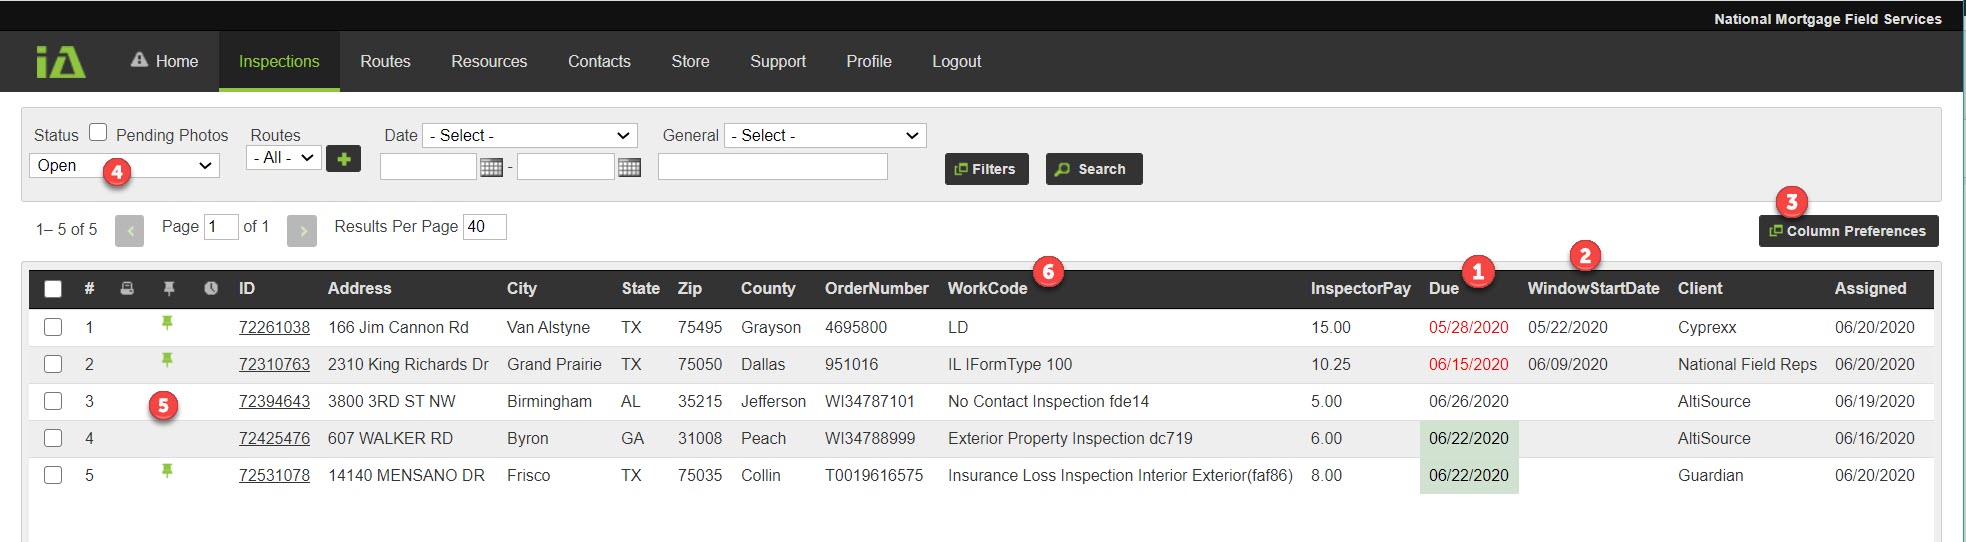
- The most critical piece of information you will want to take note of is the Due date column.
- The Window Start Date column lets you know if an inspection cannot be completed by a certain date.
- Clicking on the Column Preferences allows you to change the view of which columns show and what default the order of inspections will be shown.
- The Status pull-down list can be used for sorting such as showing inspections already completed, which ones have been paid, etc.
- The little green push-pins mean that there is an attachment on the inspection like Scope of Work, extra forms, etc.
- The WorkCode column is helpful in quickly showing you if you have any Loss Drafts, Insurance Inspections, etc. You need to open those and make appointment calls.
Individual Inspections
Hover your mouse over any inspection and the entire row will turn green. Clicking on it will open up the individual inspection.
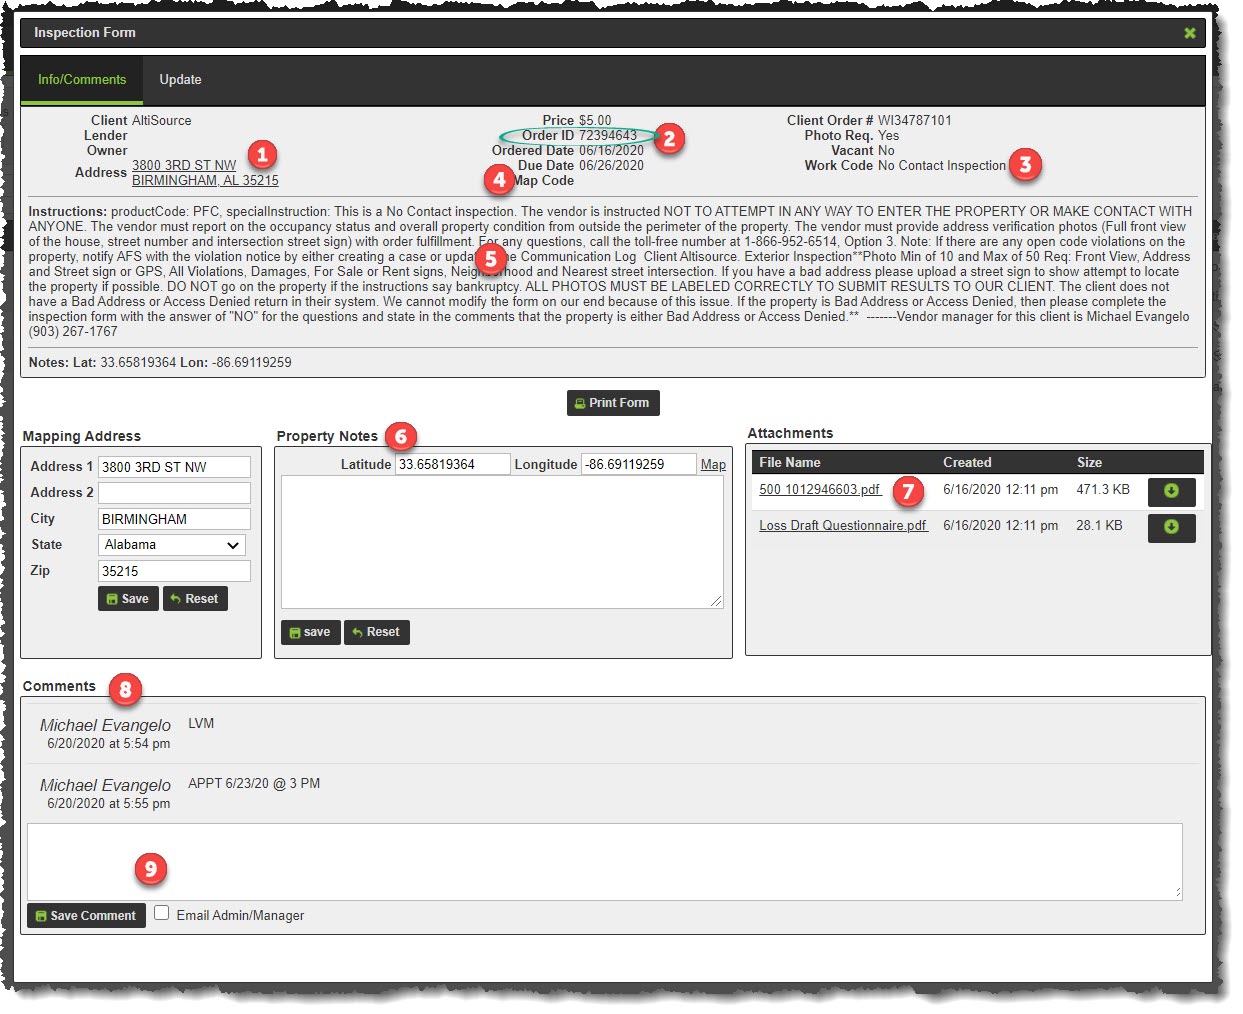
- The address is underlined because it is actually a link to your choice of maps. You can choose either Google Maps or Bing Maps. If we ask you which client the inspection is for, you will find the name of the client in the upper left-hand corner. In the example, the client is Altisource which is Deborah’s client.
- The Order ID # is unique to InspectorADE. This is the number we need if you call from the field or have a question about a particular inspection. Giving us the Order ID # is faster for us to look at the inspection up on our computers.
- The Work Code informs you of the type of inspection you are doing.
- Shows you the Due date.
- Instructions. Sometimes it may take a minute or two to read the instructions, but they will save you time and help you to complete the inspection in accordance with the requirements of the client. At the end of the instructions, it shows you who the account manager is and their phone number in case you need help.
- Below the instructions are three sections; Mapping Address, Property Notes, and Attachments. The Mapping Address is of no particular use to you. The Property Notes section is where you will find another link that will take you to Google Maps based on the latitude and longitude of the property location. In the box below the lat/long is where you can enter notes that you can read for your next visit such as “2nd house from the corner on the left”, “the house is blue”, “watch for loose dog”, etc. These comments are not sent to NMFS or the client. They are for your own notes. The next inspector who receives the inspection will be able to see the notes as well.
- The Attachments section is no doubt the most important section of the three. This is where you will find loss draft insurance forms, the Scope of Work, the insurance adjusters report, and sometimes vacancy certifications and letters to leave at the door.
- Comments may be the most important aspect of the entire website. This area will show you your own comments as well as messages about the inspection. It will show you details on Follow-Ups, warning messages, communication between NMFS, and yourself.
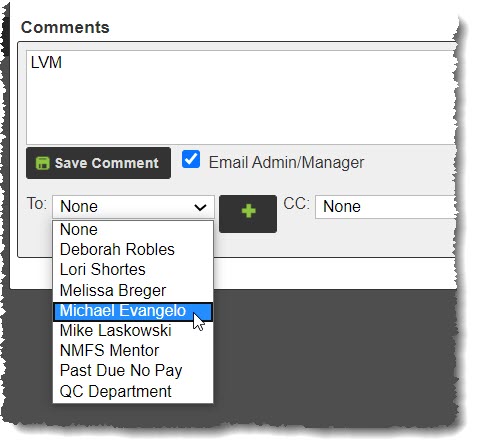
- This is where you will log your loss draft or insurance call attempts, and send messages to NMFS staff. Do not send us emails to our domain email addresses about anything having to do with an inspection. Use this comment box to send messages to us. For instance, when you have an inspection that is past due, we require you to tell us when you plan on doing it. You type in the ECD (Estimated Completion Date) with the date you plan on doing it. To send the message click on the Email Admin/Manager box and then select the person you need to send the message to based on who the account manager is.
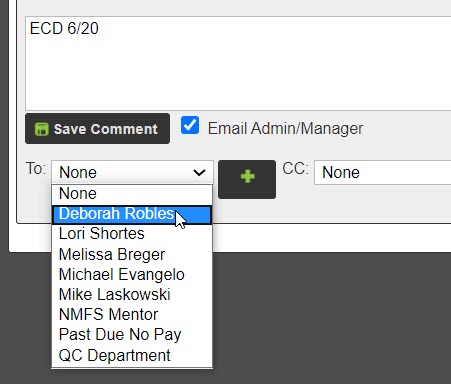
This is also where you enter comments about insurance loss inspections such as if you left a message or set up an appointment. All you have to do is type LVM or Appt set for (date), and then pick the person who is the manager of the client you are working with.